
Nothing sparks a child’s imagination like a homemade toy car they helped create. Learning how to make a toy car isn’t just about crafting a plaything—it’s about building confidence, developing fine motor skills, and creating cherished memories through hands-on creation. Whether you’re a parent seeking a rainy-day activity or a teacher planning a STEM project, this guide delivers everything you need to create amazing toy cars with simple materials.
From quick cardboard versions taking just 30 minutes to precision wooden models that become family heirlooms, the right approach depends on your tools, time, and the builder’s age. Each method teaches valuable lessons about physics, design, and problem-solving while producing something genuinely fun to play with. In this complete guide, you’ll discover four distinct approaches to making toy cars—from no-tool cardboard creations perfect for preschoolers to advanced motorized versions that introduce basic electronics.
Choose the Best Toy Car Building Method for Your Skill Level
Selecting the right construction approach ensures success and enjoyment. Your choice should consider available tools, time constraints, and the builder’s age and experience level. Each method offers unique educational benefits while producing a functional toy car.
Traditional Wooden Car Method
Perfect for beginners wanting a classic, durable toy. Requires basic hand tools and delivers professional results with proper finishing techniques. This approach teaches fundamental woodworking skills while creating a toy that can last for generations.
Cardboard Construction Method
The zero-tool approach ideal for young children or quick projects. Uses household materials for immediate gratification and creative expression. Complete a functional toy car in under 30 minutes with just cardboard, bottle caps, and a hot glue gun.
3D Printed Modern Build
Leverages technology for precise, customizable designs. Best for makers with access to 3D printers seeking complex geometries. This method introduces digital design skills while producing remarkably detailed toy cars with moving parts.
Advanced Mechanical Version
Incorporates motors, gears, and electrical systems. Suitable for experienced builders ready to explore engineering principles. This approach transforms a simple toy car into an educational platform for understanding basic electronics and mechanical physics.
Critical Safety Steps Before Making Your Toy Car
Never skip these essential safety measures before starting your how to make a toy car project. Safety protocols differ based on materials and builder age, but these fundamentals apply to all methods.
Child Safety Requirements
- Rounded edges: Sand all wooden components with 220-grit paper minimum
- Non-toxic materials: Use only water-based paints and food-grade plastics
- Choking hazard prevention: Zero small detachable parts for children under 3
- Secure assembly: Prevent component detachment through proper gluing
- Material verification: Confirm all components are lead-free throughout construction
Workshop Safety Checklist
- Eye protection mandatory during cutting and sanding operations
- Ventilation system activated for painting and adhesive applications
- First aid kit within 10 feet of your workspace
- Adult supervision required for all power tool operations
- Clean, organized workspace preventing trip hazards and material mix-ups
Build a Wooden Toy Car in 6 Simple Steps
Wood construction creates durable, heirloom-quality toy cars that withstand years of play. Follow these steps for professional results with basic tools.
Required Tools List
- Coping saw or scroll saw
- Drill with 1/8″ bit
- 120, 220, and 400-grit sandpaper
- Wood glue and small clamps
- Ruler and sharp pencil
Step-by-Step Construction Process
1. Body Preparation (15 minutes)
Mark your car silhouette on a 1″ x 2″ x 6″ pine block. Maintain 3/4″ thickness throughout the body—this prevents weak points while ensuring adequate material for shaping.
2. Precision Cutting (20 minutes)
Using smooth, consistent strokes with your coping saw, cut just outside your marked lines. Maintain a 5-degree outward angle—this creates a slight taper improving both aesthetics and aerodynamics.
3. Progressive Sanding (30 minutes)
– 120-grit: Shape curves and remove saw marks
– 220-grit: Eliminate scratches, prepare for finishing
– 400-grit: Create glass-smooth surface ready for paint
4. Axle Positioning (5 minutes)
Mark axle locations precisely 1/2″ from each end, centered vertically. Use a square to ensure perpendicular drilling—angled holes cause wobbling wheels.
5. Wheel Assembly (10 minutes)
Insert 1/8″ dowel through pre-drilled holes. Test fit wheels, then apply wood glue to axle ends before final positioning. Allow 24-hour cure time for maximum strength.
6. Finishing Touches (45 minutes plus drying)
Apply two thin coats of non-toxic paint, allowing 4-hour drying between applications. Finish with clear coat for durability and professional appearance.
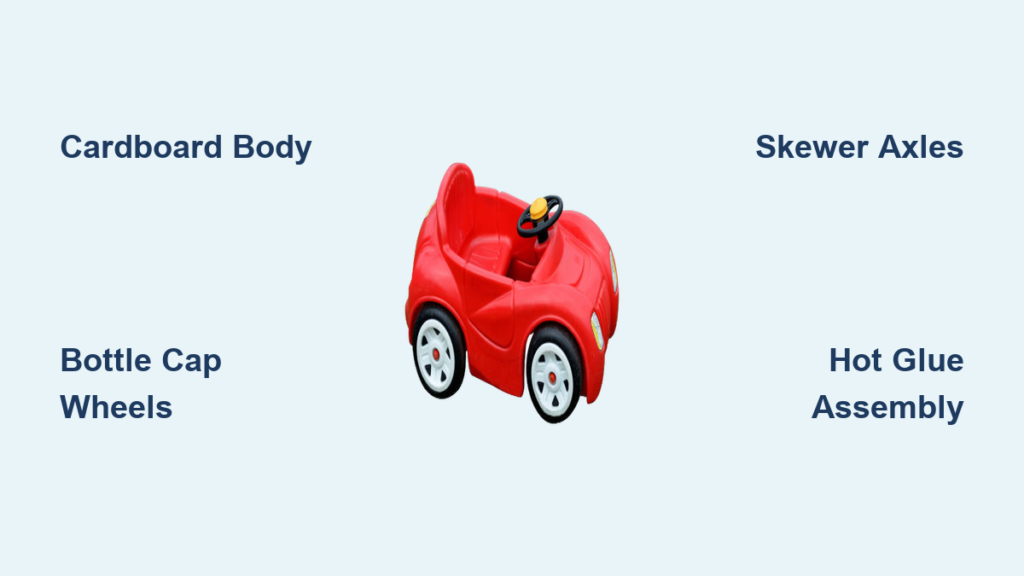
Make a Toy Car with Cardboard in 30 Minutes (No Tools Needed)
Cardboard construction offers the fastest way to make a toy car with minimal materials. This method works perfectly for young children or when you need an immediate project.
Essential Materials Gathering
- 12″ x 18″ corrugated cardboard sheet from shipping boxes
- 4 uniform bottle caps (wheels)
- 2 wooden skewers (axles)
- Hot glue gun (only tool required)
- Scissors for cutting cardboard
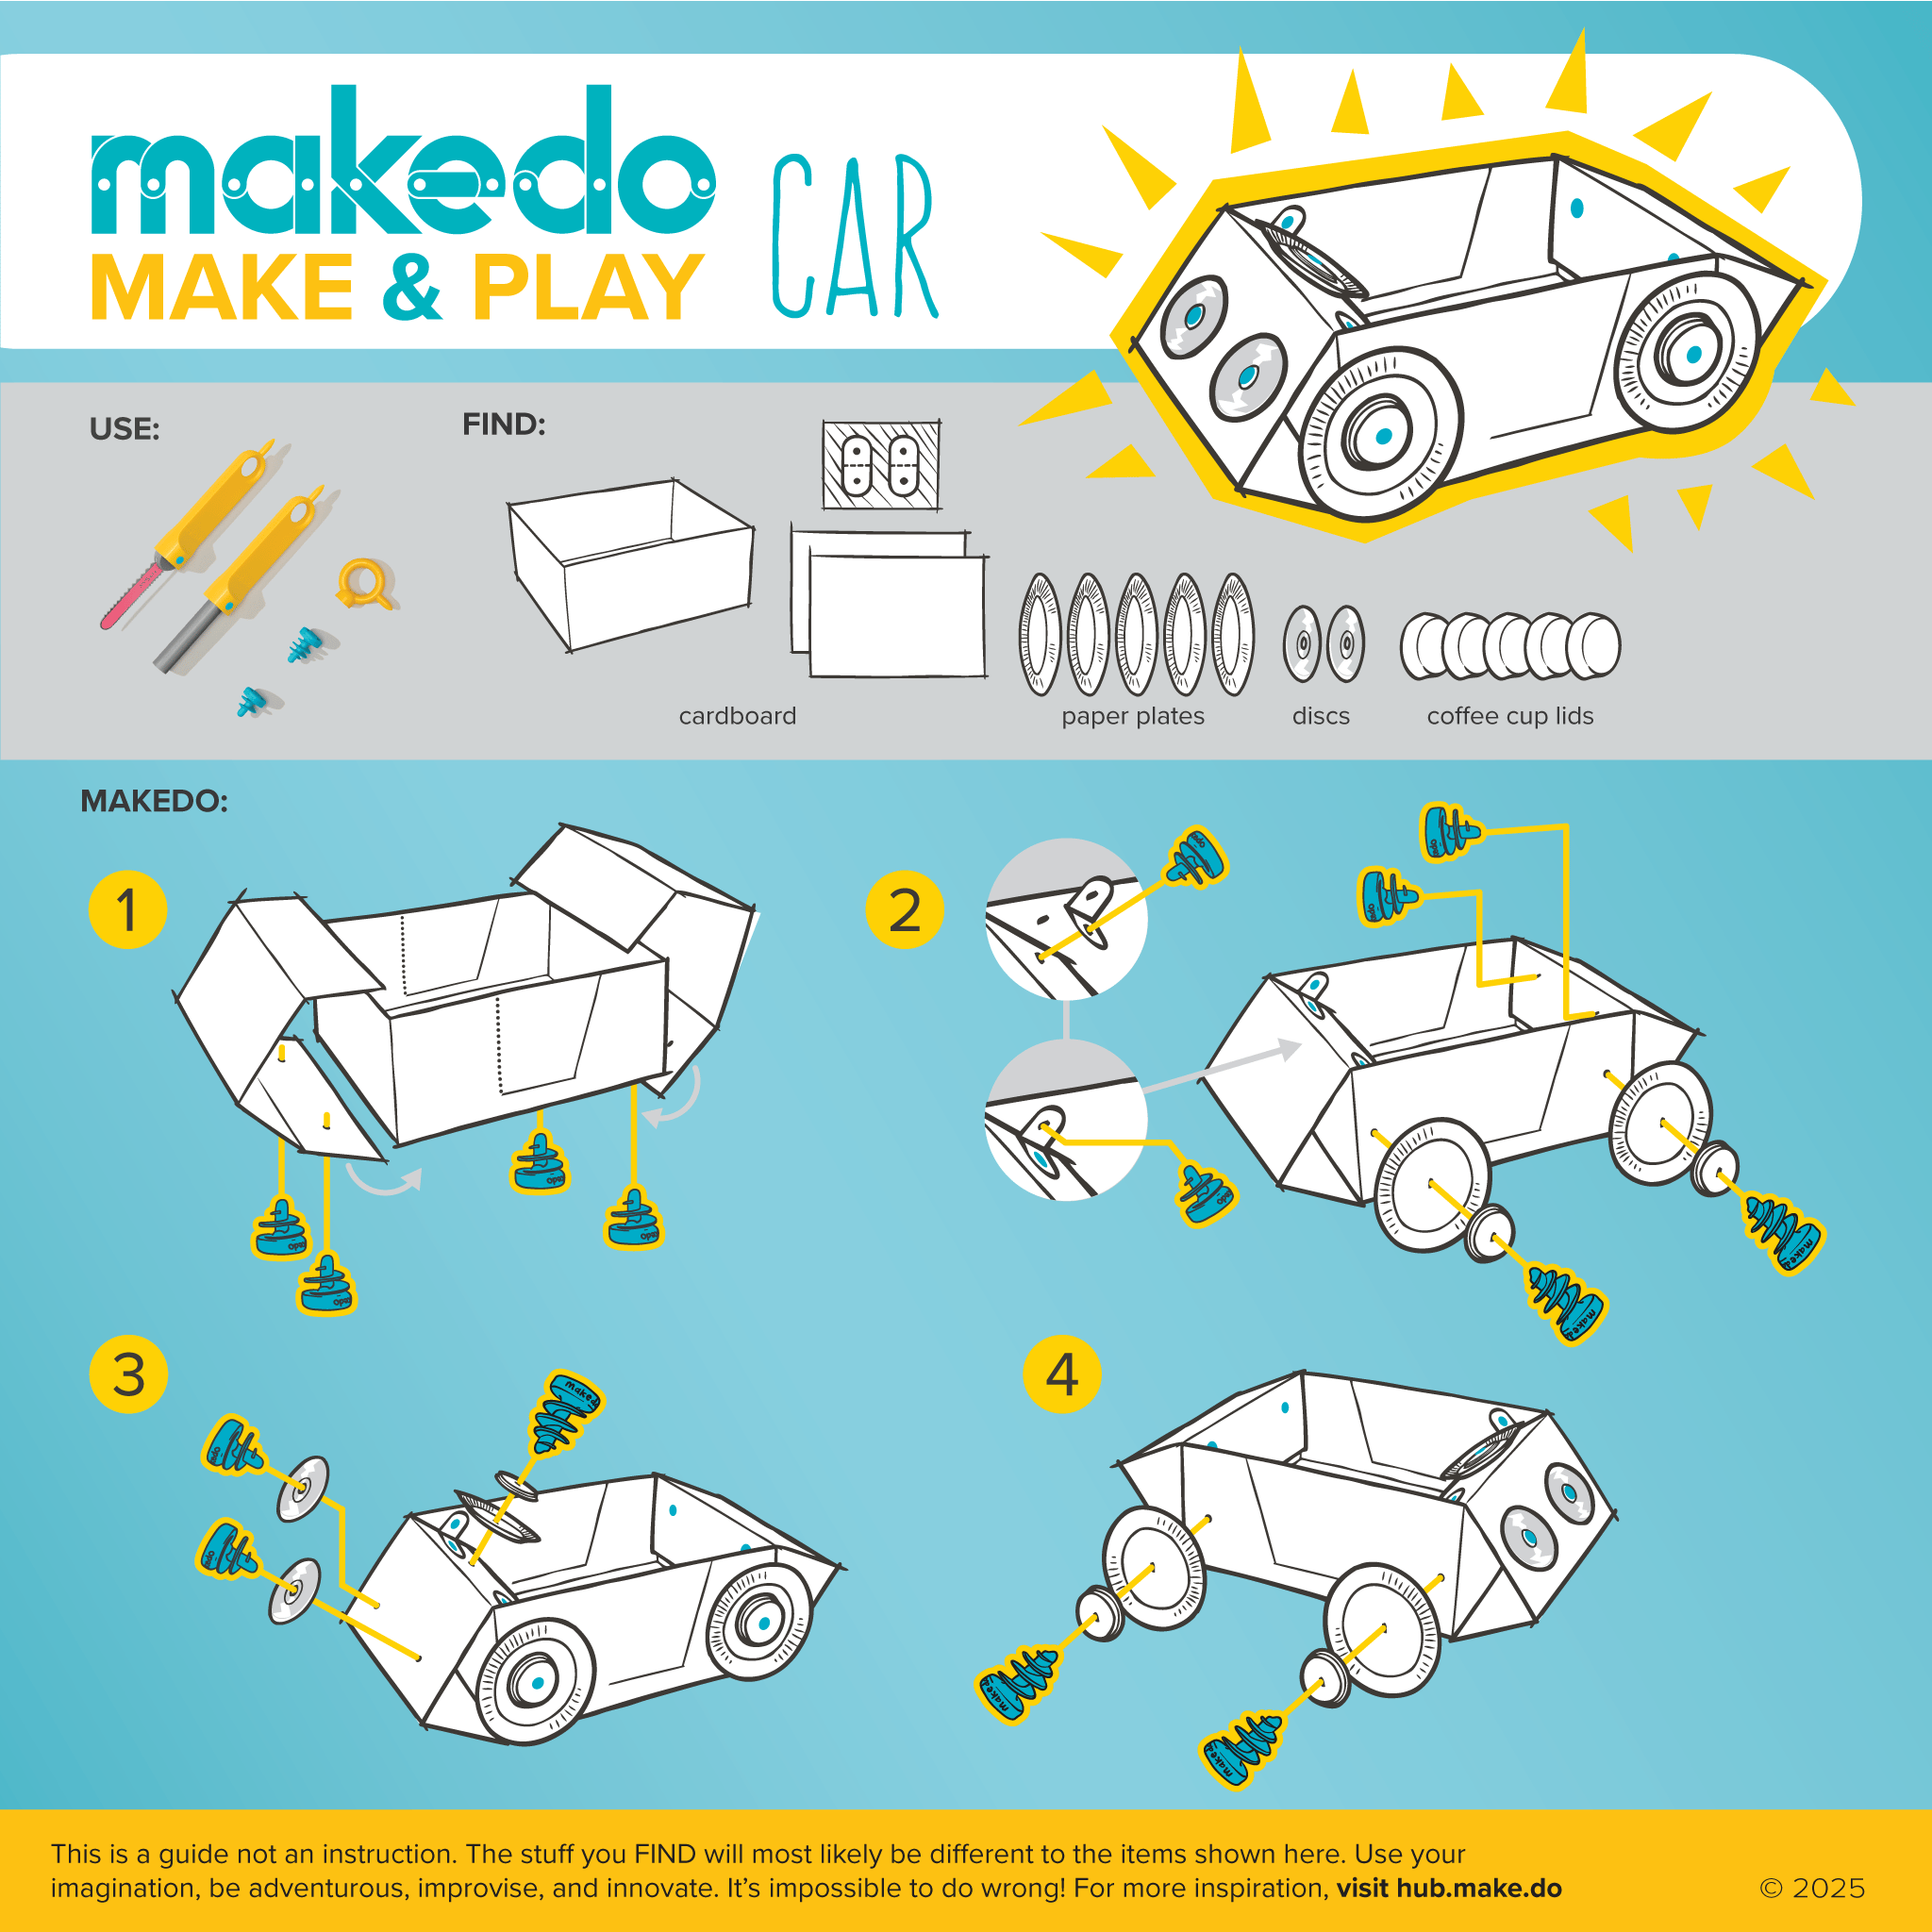
Assembly Process
- Body Creation: Cut 6″ x 2″ rectangle, add curved windshield shape
- Axle Preparation: Cut skewers to exactly 3″ lengths with straight cuts
- Wheel Mounting: Hot glue bottle caps to skewer ends—maintain 2.5″ spacing
- Body Attachment: Position cardboard body, apply glue at contact points
- Reinforcement: Add 1/4″ cardboard strips underneath for structural support
Pro Tip: Score fold lines with scissors before bending cardboard—this creates crisp edges without cracking. For added durability, apply a thin layer of white glue over the entire surface and let dry before painting.
Create a Precision 3D Printed Toy Car: Design to Finish
3D printing unlocks incredible design possibilities when you make a toy car. This method requires specialized equipment but delivers professional results with minimal hand assembly.
Critical Design Specifications
- Chassis thickness: Minimum 2mm prevents warping during printing
- Wheel clearance: 2mm gap eliminates binding during rotation
- Axle holes: Exactly 3mm diameter for M3 screws
- Support angles: Enable supports for overhangs exceeding 45 degrees
Optimal Print Settings
- PLA Filament: Nozzle temperature 210°C, Bed temperature 60°C
- Layer height: 0.2mm (quality) or 0.1mm (detailed)
- Infill: 20% for lightweight cars, 50% for durability
- Print time: 2-4 hours depending on complexity
Post-Processing Steps:
1. Remove supports carefully with flush cutters
2. Sand layer lines using 220-grit paper
3. Apply primer designed for plastics
4. Finish with acrylic paints and clear coat
Troubleshoot 5 Common Toy Car Building Problems

Even experienced builders encounter issues when they make a toy car. Here’s how to fix the most frequent problems quickly.
Wheel Wobbling Solutions
Check axle straightness using a flat surface—replace bent rods immediately. Ensure perpendicular drilling by using a drill press or guide block. For cardboard cars, reinforce axle holes with additional cardboard layers.
Paint Adhesion Issues
Clean surfaces with isopropyl alcohol before priming. Use plastic-specific primer for 3D-printed parts. Allow 48-hour cure time for maximum adhesion before handling frequently.
Structural Weakness Fixes
Reinforce joints with internal supports or thicker material. Apply epoxy instead of wood glue for critical connections. Add metal brackets at stress points for motorized versions.
Adapt Toy Car Designs for Different Age Groups
Tailoring your toy car project to the builder’s age ensures safety and appropriate challenge level. Here’s how to adjust complexity for various age ranges.
Ages 3-5: Simple Shapes Only
- Design: Large, simple shapes with no details
- Safety: Rounded edges mandatory, zero detachable parts
- Operation: Pull-string or push-powered only
- Colors: Bright primaries for visual appeal
Ages 6-8: Introduction to Tools
- Complexity: Basic assembly with adult guidance
- Tools: Introduction to simple hand tools
- Power: Push-powered or gravity ramps
- Decoration: Stickers and simple paint jobs
Ages 9-12: Independent Projects
- Construction: Independent project completion
- Power: Motorized versions with supervision
- Design: Custom modifications encouraged
- Learning: Introduction to gear ratios and physics
Ages 13+: Advanced Engineering
- Advanced builds: Full electrical systems, remote control
- Tools: Power tool mastery with safety protocols
- Design: CAD modeling and 3D printing
- Optimization: Performance testing and iteration
Keep Your Toy Car in Perfect Condition: Maintenance Guide
Proper care extends the life of your handmade toy car significantly. Follow these simple maintenance protocols to keep creations looking and functioning their best.
Monthly Inspection Routine
Check wheel tightness and axle lubrication. Test electronic connections for corrosion. Touch up paint chips to prevent moisture damage. For wooden cars, apply a light coat of mineral oil to maintain wood integrity.
Storage Best Practices
Store in dry environment between 60-80°F. Remove batteries from motorized versions during long-term storage. Display models benefit from UV-protective cases to prevent color fading. Keep cardboard creations away from humidity to prevent warping.
Final Takeaway: Master these fundamentals, then experiment freely. Each method builds upon previous skills—start with cardboard, progress through wood, then tackle 3D printing. The joy isn’t just in the finished car, but in the problem-solving journey that creates it. When you learn how to make a toy car, you’re not just building a plaything—you’re developing valuable skills that last a lifetime. Begin your first project today and experience the satisfaction of creating something truly special with your own hands.