
It’s 7 PM the night before the science fair, and your child just remembered their toy car project is due tomorrow. Don’t reach for your wallet yet—nearly every item you need is already in your recycling bin or craft drawer. This guide reveals exactly how to construct a classroom-ready toy car that demonstrates real physics principles while impressing teachers with minimal time investment. Whether you have 15 minutes or five days, you’ll learn proven techniques to build everything from a basic gravity racer to an advanced electric vehicle that actually moves under its own power.
Teachers consistently reward projects that show understanding of scientific concepts over flashy but non-functional designs. By following these methods, you’ll create a working demonstration of energy conversion, friction management, and engineering principles—plus gain the knowledge to confidently explain each component’s role. Let’s transform household junk into an A+ school project before bedtime.
15-Minute Cardboard Car That Actually Works
Cutting Your Chassis Like a Pro
Grab a sturdy cardboard shipping box—cereal boxes will buckle under wheel pressure. Cut a precise 6×3 inch rectangle using scissors for straight edges. Reinforce weak points by gluing a second layer of cardboard along the sides where wheels attach. Create wheel arches by cutting four 1×0.5 inch rectangles and positioning them 0.5 inches from each end, then glue them vertically beneath your chassis. Pro tip: Score fold lines with the back of your scissors before bending for cleaner edges.
Wheel Assembly Without Wobble
Trace four perfect circles using a bottle cap as your template—this ensures uniform size. Double-layer each wheel by gluing two circles together, which prevents warping during races. Cut two drinking straws to exactly 3 inches and tape them parallel underneath your chassis, maintaining consistent 0.5-inch spacing from each end. Thread wooden skewers through the straws, then secure bottle cap wheels to the ends with hot glue. Critical check: Lift the car and spin each wheel—any wobble means your axle holes aren’t centered.
Instant Presentation Upgrades
Add a cockpit by cutting a 2×1 inch rectangle, angling it 45 degrees, and gluing it near the front. Create windows using colored markers or cutout paper squares. Apply racing stripes with contrasting duct tape strips cut to 4-inch lengths. Time-saver: Use a coin to trace consistent wheel openings in bottle caps before attaching them to skewers.
Balloon-Powered Speed Demon (20-Minute Build)
Lightweight Body with Maximum Thrust
Cut a plastic water bottle lengthwise using sharp scissors—the curved shape slices through air better than flat cardboard. Trim to 8 inches long for optimal balloon placement. Create a 3×2 inch cardboard platform and tape it centered on top to hold your balloon mount. Warning: Avoid soda bottles—they leave sticky residue that attracts dirt and adds weight.
Propulsion System That Goes Straight
Secure a standard balloon to a bendy straw using two rubber bands. Tape the straw so its end extends exactly 0.5 inches beyond the bottle’s rear—this directs thrust straight back. Inflate through the straw, pinch to hold air, then release by removing your fingers. Troubleshooting: If your car spins in circles, reposition the straw to centerline and ensure your balloon nozzle points perfectly backward.
Distance-Boosting Aerodynamics
Add two paper fins cut from index cards and tape them vertically to the rear for stability. Position your balloon mount at the exact center of mass—usually 1 inch forward of the middle point. Pro move: Test on smooth surfaces only; carpet friction cuts travel distance by 60% compared to hardwood or tile.
Rubber Band Drive Mastery (30-Minute Advanced Build)

Chassis That Handles Serious Power
Upgrade to foam board (8×4 inches) for strength without weight gain—it’s the secret weapon teachers rarely see in school projects. Create a rear axle hook by bending a large paperclip into a tight “J” shape and embedding it in your rear skewer. Install a front anchor using another paperclip secured under the chassis nose with hot glue. Visual cue: Your hook should sit flush with the wheel surface to maximize rubber band contact.
Power Transfer Without Slippage
Loop a #64 rubber band from rear axle hook to front anchor—this specific size delivers optimal power. For easier winding, tape a 0.5-inch dowel piece to your rear axle as a winding peg. Turn wheels backward 15-20 rotations; more twists increase distance but risk band breakage. Critical step: Always release by setting the car down first, then letting go—releasing in mid-air causes unpredictable launches.
Winning Performance Tweaks
Test different rubber band thicknesses—#32 bands work for small cars, but #64 provides ideal power for standard school projects. Add two penny weights near drive wheels for better traction on slick surfaces. Expert secret: Lightly sand axle ends where they enter wheels to eliminate friction hotspots that steal precious distance.
Electric Motor Car (Teacher’s Dream Project)
Motor Mounting That Won’t Fail
Secure a 3-6V DC motor using hot glue inside a small cardboard box positioned over the rear axle. Attach a rubber band drive belt from motor shaft to rear axle—stretch it until it grips firmly without slipping. Install a toggle switch on the car’s top surface for easy on/off control. Warning: Never connect wires directly to batteries without a switch—this risks short circuits.
Foolproof Wiring Setup
Connect two AA batteries in a holder using red (positive) and black (negative) wires to your switch, then to the motor. Test connections before final assembly—reverse wires if car moves backward. Hide batteries under a hinged cardboard hood for professional appearance while maintaining access. Pro tip: Wrap wire connections with electrical tape to prevent accidental shorts during presentation.
Instant Electric Troubleshooting
If wheels don’t turn, check belt tension—too loose slips, too tight stalls the motor. For slow speeds, reduce weight by drilling small holes in non-structural areas. Ensure wheels are perfectly aligned—misalignment drains battery power rapidly. Quick fix: Apply a drop of sewing machine oil to axle points if rotation feels stiff.
Proven Testing Methods That Impress Teachers

Distance and Speed Documentation
Mark a starting line with tape and measure travel distance across three runs—teachers love seeing you account for variables. Calculate speed by timing travel over 10 feet (distance ÷ time = speed). Test on different surfaces: smooth floors maximize distance, while textured surfaces test traction designs. Presentation hack: Create a simple table showing results—this demonstrates scientific method understanding.
Critical Fixes for Last-Minute Emergencies
- Veering left/right: Place your car on a level surface and adjust the offending wheel’s position by 1-2mm
- Stops suddenly: Wax skewer axles with candle wax—reduces friction by 40%
- Poor balloon thrust: Replace with a fresh balloon—latex degrades after first use
- Rubber band snaps: Switch to thicker bands or reduce winding to 12 rotations
Presentation Secrets That Guarantee Top Marks
Scientific Explanation Teachers Crave
Explain how your car demonstrates energy conversion (potential to kinetic), friction reduction (smooth wheels/straw bearings), and aerodynamics (body shape affects air resistance). Use terms like “axle,” “chassis,” and “propulsion” correctly—this shows real learning, not just assembly. Key phrase: “I optimized my design by reducing rotational inertia through lighter wheels.”
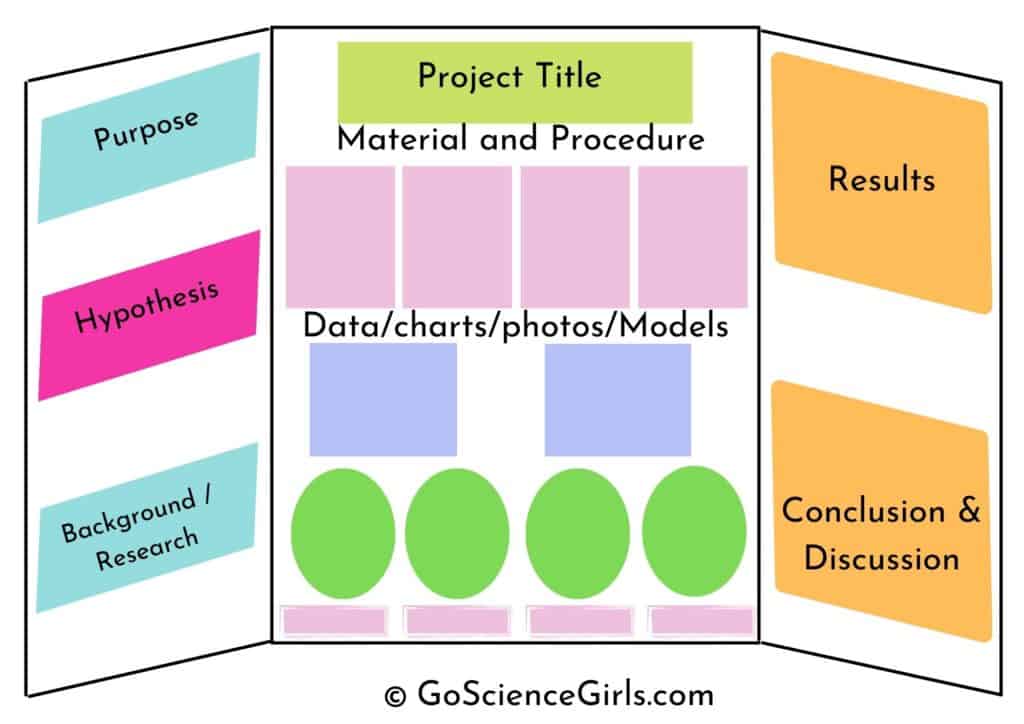
Display Elements That Stand Out
Mount your car on a small cardboard ramp to demonstrate gravity assist. Include measurement data in a simple table format showing distance improvements after each modification. Add racing numbers or sponsor decals using printed paper—these professional touches separate good projects from great ones. Pro move: Bring your initial design sketch showing your engineering process.
Safety and Success Checklist
Always supervise hot glue gun use and craft knife cutting. Test cars in open areas away from fragile items. Store electric versions without batteries to prevent accidental activation. Remember—teachers value process documentation over perfect results, so photograph mistakes alongside successes.
Your completed toy car represents physics in motion. Whether you chose simple balloon power or advanced electric drive, you’ve built a working demonstration of energy, friction, and engineering principles. Race it proudly, then explain how each component contributes to motion—that’s what earns the A+.
Final Pro Tip: Start with the 15-minute cardboard car tonight for immediate success, then use advanced techniques for your final presentation. Teachers appreciate seeing design evolution over time, which demonstrates real engineering thinking rather than just following instructions.