
Creating a toy police car brings imagination to life while developing valuable crafting skills. Whether you’re working with children on a weekend project or crafting a unique gift, building a toy police car from scratch offers endless creative possibilities. This hands-on activity sparks joy through personalized design choices and results in a cherished plaything that withstands hours of imaginative adventures. By following these practical methods and techniques, you’ll transform simple materials into a detailed police vehicle complete with authentic markings, functional wheels, and special features that make playtime more engaging.
Select Your Preferred Construction Method
Choosing the right building approach determines your project’s success and enjoyment level. Your decision should consider the builder’s age, available tools, desired durability, and how intricate you want the final result. Cardboard methods work perfectly for young children or quick weekend projects, while wooden or LEGO builds create more resilient toys for extended play sessions. Think about whether this will be a family activity or solo project, as this affects complexity and safety requirements.
Cardboard construction offers the simplest entry point for beginners. These projects need only basic supplies like scissors, glue, and markers, making them accessible for most households. Since cardboard is inexpensive and often already available, it’s ideal for spontaneous crafting. However, cardboard creations typically lack the durability for rough play over time, making them better suited for display or gentle play scenarios.
For more robust results, consider wooden craft sticks, LEGO building systems, or 3D-printed components. These approaches yield sturdier toys with enhanced detail potential but require additional tools, time, and possibly adult supervision. The extra effort pays off with toys that become long-term favorites rather than temporary crafts. Wooden builds particularly withstand enthusiastic play, while LEGO offers the most sophisticated wheel functionality with its specialized Technic components.
How Long Each Method Takes
Cardboard police cars can be completed in 1-2 hours, making them perfect for short attention spans or quick projects. Wooden craft stick builds typically require 3-4 hours of focused work, spread over multiple sessions to allow for glue drying time. LEGO constructions vary greatly depending on complexity—simple designs take 30-60 minutes, while detailed models with functional features may require several hours.
Gather All Necessary Materials Before Starting

Collecting materials upfront prevents frustrating interruptions mid-project. For cardboard construction, you’ll need a medium-sized box (cereal, shoe, or small shipping boxes work well), additional cardboard scraps for wheels and details, white school glue or hot glue gun, masking tape for reinforcement, and acrylic paints in black, white, and blue. A clear drying sealant will protect your finished creation from wear and tear.
Wooden craft stick projects require approximately 100-150 standard sticks depending on design complexity. Wood glue creates stronger bonds than white glue for this material, while wooden skewers or dowels serve as axles. Round wooden beads or pre-cut wheels form the actual wheels, and acrylic paints in police colors complete the visual design. Keep sandpaper handy to smooth rough edges before painting.
LEGO builders should inventory their collection to ensure sufficient black, white, blue, and transparent pieces. Focus on gathering flat tiles for smooth surfaces, Technic components for functional wheels, and specialized pieces for details like sirens and antennas. The beauty of LEGO is that you can modify your design based on available pieces.
Common Material Substitutions
Don’t let missing supplies stop your project—get creative with alternatives. Plastic bottle caps make excellent wheels when cardboard or wooden options aren’t available. Old magazines provide free colored paper for detailing when paint runs low. Rubber bands wrapped around wheels add traction and create realistic tire treads. Empty toilet paper rolls can form the car body when larger boxes aren’t accessible.
Construct the Car Body with Proper Reinforcement
The body forms your police car’s structural foundation, so careful construction ensures both integrity and visual appeal. For cardboard projects, begin by cutting and shaping main body pieces. A rectangular box with the top cut at an angle creates an authentic car profile—the angled section mimics the sloping hood and windshield. Score fold lines along edges where you need curved surfaces, as scored cardboard bends cleanly without cracking.
Reinforce critical joints with additional cardboard strips glued inside seams where strength matters most. Pay special attention to wheel well connections since these areas experience stress during play. Apply glue generously and allow full drying time—rushing this step compromises the entire structure. Once assembly is complete, fill any gaps with small cardboard pieces and smooth with sandpaper when dry.
Wooden craft stick construction follows different principles. Start with a base layer, arranging sticks edge-to-edge to form a solid floor panel. Build upward from this foundation, staggering joints like brickwork for maximum strength. Side panels rise vertically from the floor with careful attention to matching heights across both sides. A roof section, either flat or slightly curved, completes the enclosure and creates remarkable sturdiness.
Create Functional Wheels That Roll Smoothly

Working wheels transform your creation from static model to interactive toy. For cardboard cars, cut circular wheels using a compass or round object as a template for consistent sizing. Four identical wheels work best, though larger rear wheels mimic classic police cruisers. Poke holes through wheel centers and thread a wooden skewer or straw through for the axle, securing each wheel with glue or tape where it meets the body.
Wooden wheel construction follows similar principles but uses more durable materials. Round wooden beads or pre-cut wooden wheels create professional results with minimal effort. Carefully drill or puncture centered axle holes to ensure even rolling. Some crafters wrap rubber bands around wheels for better traction—the bands grip smooth floors better than bare wood and add authentic tire appearance.
LEGO builds offer the most sophisticated functionality with Technic components. These specialized pieces include actual axles, wheel hubs, and suspension elements that create working shock absorbers. The wheels rotate freely and suspension compresses realistically, delivering exceptional play value. This complexity requires more pieces and planning but rewards builders with superior interactivity.
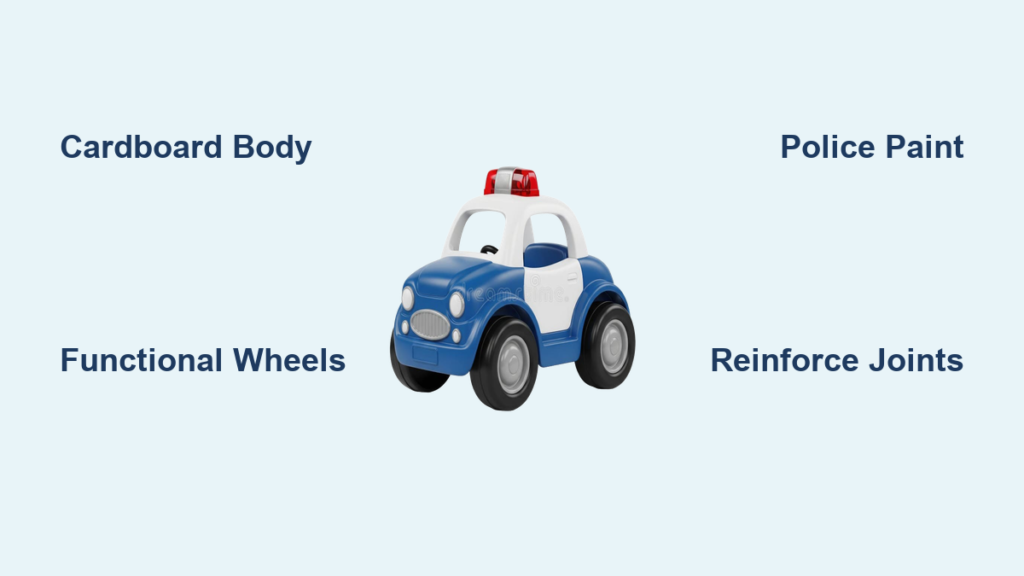
Add Authentic Police Details for Realistic Appearance

Police car detailing elevates your creation from generic vehicle to believable law enforcement machine. The color scheme remains most recognizable—white body with blue stripe or full blue hood is standard. Apply paint in clean, straight lines using masking tape as a guide. Press tape edges firmly to prevent bleed-under, applying two thin coats rather than one thick coat for crisp results.
The word “POLICE” or “911” stenciled on the sides provides instant recognition. Stencils cut from masking tape or reusable plastic templates create professional lettering. Position this marking prominently on front or rear doors depending on your body design. Some builders add star emblems or department-style badges for additional authenticity.
Sirens and emergency lights distinguish police vehicles. Small red and blue LED lights add blinking realism and require only battery power and simple wiring. Alternatively, sculpted clay or painted patterns create non-functional but convincing lights. A whip antenna extending from roof or trunk adds another distinctive element, as does a push bar on the front bumper made from painted cardboard or wooden dowels.
Apply Protective Finishes for Longevity
Clear acrylic sealant significantly extends your toy’s lifespan while enhancing appearance. Available in matte or glossy finishes, it shields paint from chipping and cardboard from moisture. Apply sealant in thin, even coats with adequate drying time between applications—typically 15-30 minutes depending on conditions. Two to three coats provide sufficient protection for normal play.
Consider edge protection for high-wear areas. Duct tape applied to wheel edges prevents the first rub-and-go marks from deteriorating appearance quickly. Clear packaging tape works for less-visible areas where aesthetics matter less. These simple reinforcements address common failure points before they become problems.
Store your creation properly to maximize longevity. Position displayed toys away from direct sunlight which fades paint over time. For active play, establish a designated storage spot that protects the car from being stepped on or crushed. Teaching proper storage habits from the beginning establishes respect for handmade items and keeps crafts in good condition for years.
Troubleshoot Common Construction Problems
Wheel alignment issues cause many toy cars to veer unexpectedly. If your creation pulls to one side, check that all wheels sit parallel to each other and perpendicular to the axles. Slightly loose axle connections allow wheels to tilt, while overly tight connections bind and drag. Adjust spacing between wheels on each axle—exactly the same distance on both sides ensures straight rolling.
Paint adhesion problems plague cardboard projects. New cardboard contains sizing agents that resist paint bonding, so prime surfaces with white glue thinned with water before painting. Allow proper drying time between layers—rushing this step causes peeling and flaking later. Humid conditions may require extended drying times or a gentle fan to speed evaporation.
Structural failures typically occur at stress points like wheel mounts. Reinforce these areas during initial construction rather than repairing them repeatedly. Adding triangular support pieces behind wheel mounts distributes stress more effectively. Roof sections benefit from corner bracing that prevents racking—the diagonal twisting that eventually separates joints.
Maintain Your Toy Police Car for Years of Play
Regular maintenance keeps your custom police car rolling and looking its best. Monthly inspections identify developing problems—loose wheels, chipping paint, or weakening joints all respond to early intervention. Tighten axle connections, touch up paint chips with matching colors, and re-glue separating joints before they worsen.
Cleaning removes accumulated dust and grime that dulls finishes. A soft cloth dampened with water and mild soap safely cleans most surfaces without damaging paint or sealant. Avoid harsh cleaners or abrasive scrubbing, which strip finishes and scratch surfaces. For moving parts like wheels, remove accumulated debris from axle holes to maintain smooth operation.
Storage conditions significantly impact longevity. Climate-controlled environments prevent moisture fluctuations that warp cardboard and loosen glue joints. Avoid attic or garage storage where temperature and humidity swing dramatically. When transporting your police car, pack it in a rigid container with cushioning material that prevents shifting during transit.