
Your living room floor is buried under a sprawling Hot Wheels metropolis, but bedtime means reclaiming your space—without snapping plastic connectors or losing tiny pieces. How to take apart Hot Wheels track properly transforms chaos into organized storage, preserving every loop and launcher for tomorrow’s races. Forget yanking pieces apart; this method prevents warping, saves future reassembly headaches, and keeps those tongue-and-groove joints intact. Whether you’re dismantling a basic loop or a motorized mega-track, you’ll learn exactly how to disassemble Hot Wheels track systems safely in under 20 minutes.
Most parents make the critical mistake of pulling track pieces straight apart, stressing the plastic until connectors crack. But with the right technique, every section releases cleanly with a satisfying click. This guide reveals pro disassembly secrets straight from Hot Wheels engineering principles—no special tools required. You’ll discover why vertical separation beats horizontal pulling, how to rescue stuck connections without damage, and the storage system that makes reassembly 3x faster. Let’s get your track race-ready for storage.
Essential Pre-Disassembly Setup Checklist
Clear Your Work Surface Properly
Spread your track system on a 4×6 foot flat surface like a dining table—carpet traps small pieces. Position a bright lamp overhead to spot every connection ridge; dim lighting causes missed connectors that break during separation. Keep three small containers within arm’s reach: one for straight gray connectors, one for curved segments, and a third for launchers and loops.
Critical first step: Remove every Hot Wheels car before touching the track. Cars love nesting in loop bases and under jump ramps—find them now to avoid disassembling half your track only to discover a stray vehicle. Run your fingers along every curve and under support stands; it takes 60 seconds but saves major frustration later.
Identify Track Sections Before Touching Anything
Snap photos of your entire layout from corner to corner—these become your reassembly blueprint. Then categorize components systematically:
- Straight orange segments (note lengths: short under 8″, medium 8-16″, long over 16″)
- Curved sections (90° gentle turns, 180° U-turns, 270° corkscrews)
- Specialty elements (spring launchers with red buttons, motorized boosters, jump ramps)
- Support structures (gray stands with release tabs, suction-cup bases, claw grips)
This 2-minute audit prevents mid-disassembly confusion when you wonder why a 270° curve won’t reconnect later. Label sections mentally: “left banked curve,” “booster zone,” etc.
Disconnect Standard Track Segments Without Damage

Horizontal Separation for Most Connections
Grasp two connected orange track pieces firmly, thumbs positioned on the top ridge where segments join. Apply steady downward pressure while gently pulling apart—never yank straight back. You’ll feel and hear the tongue-and-groove joint release with a distinct click. This method works for 90% of straight sections and gentle curves.
Pro tip: Support the track’s underside with your pinky finger during separation to prevent bending. Forcing connections horizontally creates permanent warps that cause future derailments. If resistance exceeds light thumb pressure, switch to the vertical method below.
Vertical Technique for Stubborn Joints
When connections resist horizontal separation, flip the track vertically with one end higher. Support the lower segment firmly against the table while twisting the upper piece just 10 degrees and pulling downward. Gravity assists the release, eliminating the side-to-side wiggling that cracks plastic. Works wonders for aged tracks where plastic has stiffened.
Time saver: Focus on “connection clusters” first—groups where 3+ segments meet. Disconnecting these hubs early collapses large sections efficiently. Allow 30 seconds per stubborn joint; patience prevents breakage.
Remove Specialty Elements Without Snapping Parts
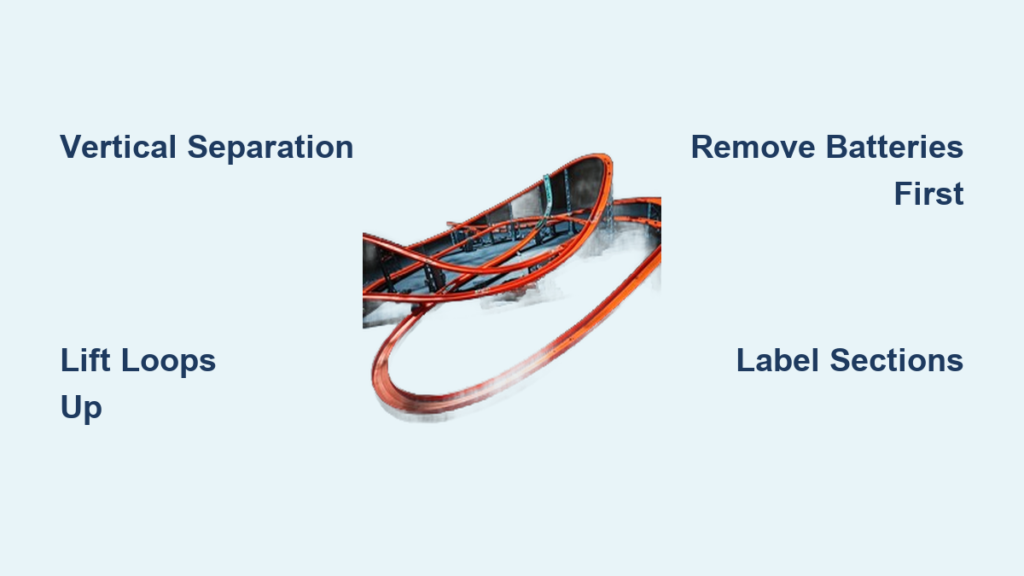
Loop Deconstruction in 4 Steps
Loops require weight support to avoid stress fractures. First, locate the gray loop support frame—its legs have small release buttons. Lift the orange loop track upward (never sideways) while supporting its full weight. Once free, disconnect the loop into 2-3 segments by pressing thumbs on top ridges. Finally, collapse the frame by pressing leg buttons or separate legs individually.
Critical mistake to avoid: Pulling loops horizontally. This bends the plastic groove, making reassembly impossible. Always lift vertically!
Launcher and Booster Removal Protocol
Spring launchers: Press the red release button while lifting straight up—no twisting. Motorized boosters: Unclip from track first (press side tabs), then remove batteries to prevent corrosion. Gravity drops: Lift off with zero force—they’re designed to sit loosely. Cobra coils: Support the entire coil weight while unwinding from connections; never let it dangle.
Warning: For spring-loaded parts, wear safety glasses. Accidental releases can launch components at high speed.
Organize Components for Instant Reassembly
Smart Categorization System
As you disassemble, create labeled piles:
– Track segments: Short (<8″), medium (8-16″), long (>16″)
– Curves: Group identical angles (all 90° together)
– Connectors: Straight vs. angled in separate containers
– Supports: Stands, bases, and clamps by type
– Specialty: Launchers, loops, jumps in one bin
Pro tip: Place rubber bands around (not over) straight track stacks—this prevents permanent indentations. Zip-top bags with permanent marker labels (e.g., “180° curves”) beat loose piles.
Warping-Proof Storage Solutions
Store all orange track flat in plastic bins—never coil loops long-term. Slide curved pieces together like puzzle rings to save space. For motorized parts, store batteries separately in anti-static bags. Keep instruction manuals clipped to the longest track segment using binder rings.
Preservation key: Avoid garages or attics. Extreme temperatures warp plastic 3x faster—store in climate-controlled spaces only.
Fix Common Disassembly Problems Immediately
Stuck Connection Emergency Fixes
When joints refuse to budge:
1. Apply a hair dryer on low 6 inches away for 10 seconds—heat expands plastic microscopically
2. Use plastic spudgers (phone repair tools) to gently pry connection ridges
3. Soak in warm (not hot) water for 2 minutes if still stuck
4. Never use metal screwdrivers—they scratch grooves causing future instability
Time estimate: 5 minutes max per stubborn joint. If unresolved, set aside and revisit later—forced separation guarantees breakage.
Broken Connector Repair Tactics
For cracked gray connectors: Super glue (cyanoacrylate) bonds best—apply sparingly with toothpick, clamp for 60 seconds. Orange track repairs need epoxy for flexibility; sand edges smooth before applying. Mattel’s customer service provides free replacement parts for current sets—have your set number ready.
Pro note: Photograph broken pieces before repair attempts. This helps identify exact replacements if needed.
Advanced Motorized System Disassembly
Battery-Powered Component Protocol
Always remove batteries before disassembly—corrosion destroys more tracks than crashes. For motorized boosters: Press both side release tabs simultaneously while lifting straight up. Disconnect wiring plugs by gripping the plastic housing, never the wires. Note gear orientations with quick phone photos before removing.
Critical step: Clean battery contacts with cotton swab and vinegar if corrosion exists. Neglecting this causes future power failures.
Safety and Longevity Best Practices
Physical Safety Non-Negotiables
Wear safety glasses with spring-loaded launchers—stored energy can eject parts at 20+ mph. Work on carpet or towels to prevent track bounce losses. Keep small connectors in lidded containers away from toddlers and pets during disassembly. Use daylight-bright LED lamps to avoid eye strain on tiny connection points.
Track Preservation Commandments
Document your layout with timestamped photos before starting—this is your reassembly GPS. If a connection resists, stop and reassess; brute force creates permanent damage. Store all pieces away from windows—UV rays degrade plastic in 6 months. For complex sets, create a numbered sketch showing section relationships (e.g., “Section 3: Left Banked Curve to Loop”).
Pro tip: Place silica gel packs in storage bins to prevent moisture warping. Check them quarterly for saturation.
Your Hot Wheels track system now rests in organized, warping-proof storage—every connector intact, every loop ready for its next adrenaline run. You’ve mastered the critical vertical separation technique that prevents 90% of disassembly damage and implemented the categorization system that cuts reassembly time in half. Remember: patience with stubborn joints pays off in track longevity, and climate-controlled storage is non-negotiable for preserving plastic integrity. The next time you build a mega-loop cityscape, you’ll disassemble it with pro confidence knowing every piece will survive for years of racing. Now go reclaim that living room—and dream up tomorrow’s track design.