
There’s nothing quite like the satisfying click of tabs locking into place as your Optimus Prime action figure shifts from heroic robot to iconic red truck. For generations of Transformers fans, mastering this transformation has been a rite of passage that connects us to the magic of the franchise. Whether you’ve just unboxed a new figure or rediscovered an old favorite in your collection, knowing how to transform Optimus Prime toy into truck mode properly ensures your figure remains intact for years of enjoyment. This guide delivers the exact steps you need to convert your Optimus Prime seamlessly while avoiding common pitfalls that damage these detailed collectibles.
Essential Setup Before Transforming Your Optimus Prime
Before touching a single tab on your Optimus Prime figure, prepare your workspace properly to prevent damage and lost parts. Cover your table with a soft microfiber cloth or foam mat that provides cushioning while creating contrast against small plastic pieces. A light-colored surface works best for finding dark-colored parts that might pop off during transformation.
Examine your specific Optimus Prime model for stiff joints or potential problem areas before beginning. Run your fingers along all major connection points to identify any resistance that might indicate paint rub or misalignment from previous transformations. For vintage figures showing signs of wear, apply a microscopic amount of silicone lubricant to tight joints—never petroleum-based products that can degrade plastic over time.
Keep a small container nearby to hold detached pieces like weapons, accessories, or removable armor panels. These small components often fall out unexpectedly during transformation sequences. Position a bright LED desk lamp to eliminate shadows that could cause misalignment during critical connection steps.
Identify Your Optimus Prime Toy Class for Correct Transformation

Leader Class Transformation Requirements
Leader Class Optimus Prime figures feature the most complex transformations with 70-100 individual steps that typically take 20-30 minutes to complete. These premium figures often include rolling wheels, opening cargo bays, and intricate tab-and-slot connections that require precise alignment. Before starting, verify that all hinge points move freely and that no pins obstruct the transformation path.
Voyager Class Transformation Sequence
Voyager Class Optimus Prime toys strike the ideal balance between detail and playability with transformation sequences that take 10-15 minutes. These figures maintain accurate truck proportions while featuring fewer individual connections than Leader Class versions. Pay special attention to the waist joint, which often serves as the critical connection point between cab and trailer sections.
Step-by-Step Transformation Process for Most Optimus Prime Figures
Release Critical Robot Mode Connections
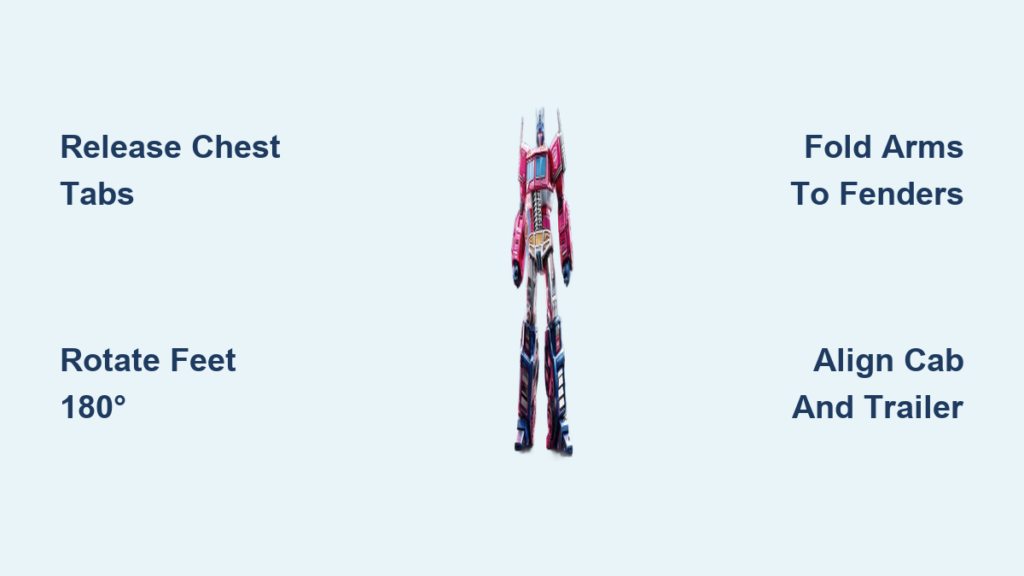
Begin by standing your Optimus Prime firmly in robot mode. Locate the chest release mechanism—typically two small tabs on either side of the torso—and press inward while lifting the chest plate upward and away from the body. Most modern Optimus Prime figures require this first step before any other transformation can proceed.
Rotate the feet 180 degrees to begin forming the front wheels. The ankle joints contain the pivotal connection that converts robot legs into truck axles. Apply gentle but firm pressure until you hear the distinct “click” indicating proper alignment. For figures with heel wheels, ensure these components tuck cleanly inside the foot assembly before proceeding.
Swing the shoulder panels outward to separate them from the robot’s arm position. These components will eventually form the truck’s front fenders, so verify they rotate freely without resistance. If you encounter stiffness, don’t force the movement—backtrack to ensure you haven’t missed an earlier release step.
Convert Upper Body to Truck Front Section
Fold the chest piece backward and downward to form the truck hood. Proper alignment is critical here—most Optimus Prime designs require the grille detail to face precisely forward with the Autobot insignia centered. Misalignment at this stage creates cascading problems that prevent proper connection later.
Tuck the head securely into its truck mode position. On most figures, this involves rotating the head downward and securing it inside the chest cavity. Verify that the head doesn’t protrude beyond the cab profile, as this indicates improper positioning that will interfere with subsequent steps.
Attach the arm assemblies to their designated truck mode locations. The robot arms typically fold and rotate to form the front wheel wells and fenders. Align all connection points carefully, pressing each tab firmly until you feel it seat completely. Improperly seated arm connections are the most common cause of instability in final truck mode.
Transform Lower Body into Truck Rear Section
Fold the thighs backward to create the trailer section or rear cargo area. The transformation sequence varies significantly by toy class—some figures require complete disassembly of the legs while others simply rotate the entire lower body segment. Consult your specific figure’s instructions if available.
Position the lower legs to form the rear wheels and axles. Most Optimus Prime designs have the robot shins rotate to become the truck’s rear fenders. Ensure these components align symmetrically to prevent the final truck mode from sitting unevenly.
Connect the cab section to the trailer or rear cargo area. This critical connection typically occurs at the waist joint and requires precise alignment. Hold both sections firmly while pressing them together—many figures have alignment pins that must seat perfectly before the connection locks.
Final Verification and Adjustment
Test all wheel rotation to confirm proper axle alignment. Gently roll your Optimus Prime truck across a flat surface—if any wheels bind or wobble, revisit the leg transformation steps to ensure proper alignment. Smooth rolling indicates successful transformation.
Check for panel gaps that might indicate misalignment. Small gaps are normal on many figures due to manufacturing tolerances, but large gaps often signal a missed step. Work backward through the transformation sequence to identify where the error occurred.
Verify that all connection points remain secure when lifting the truck by its cab section. A properly transformed Optimus Prime should hold together without parts separating under its own weight.
Troubleshooting Common Transformation Problems

Fixing Stubborn Joints Without Damage
When encountering stiff joints during transformation, apply the “wiggle and press” technique rather than forcing movement. Hold the resistant section firmly while applying gentle side-to-side pressure—this often releases paint binds or minor misalignments. For persistent issues, use a cotton swab with a tiny amount of isopropyl alcohol on the joint to dissolve accumulated debris.
Recovering from Partial Transformations
If your Optimus Prime gets stuck mid-transformation, don’t panic. Identify the last successfully completed step and work backward to robot mode before attempting again. Many partial transformations occur when skipping prerequisite steps—each connection point depends on previous transformations being completed correctly.
Addressing Missing or Dislodged Parts
When small pieces fall out during transformation, stop immediately and search your workspace thoroughly. Many Optimus Prime figures have hidden storage compartments where accessories tuck during truck mode. Check all potential storage areas before concluding a piece is truly missing.
Maintenance Practices for Long-Lasting Transformations

Store your Optimus Prime in its preferred mode consistently rather than alternating frequently. Constant transformation wears down connection points over time. Choose display mode based on your collection needs—truck mode often shows off more paint details while robot mode displays character personality.
Clean joints every six months with a soft toothbrush and mild soapy water to remove accumulated dust and grime. Thoroughly dry all components before reassembling to prevent moisture damage. Avoid harsh chemicals that could degrade plastic or remove paint applications.
Apply a light coat of plastic protectant to exposed surfaces every year to prevent UV damage and plastic degradation. This simple step significantly extends your figure’s lifespan, especially for vintage pieces showing early signs of “plastic rot.”
Expert Transformation Tips You Won’t Find in Instructions
Develop a consistent transformation rhythm by practicing the sequence slowly at first. Most collectors find that transforming their Optimus Prime three times in a row builds muscle memory that makes subsequent transformations faster and more reliable.
Photograph each transformation step with your smartphone to create a custom visual guide. These reference images prove invaluable when transforming after long storage periods or when working with complex Leader Class figures that have intricate sequences.
Carry a small tube of silicone lubricant in your collector’s kit for field repairs at conventions or meetups. A tiny application can rescue a stiff joint that might otherwise prevent transformation during social events.
Mastering how to transform Optimus Prime toy into truck mode properly connects you to decades of Transformers tradition while preserving your investment. With careful preparation, understanding of your specific figure’s transformation requirements, and attention to detail during each step, you’ll enjoy seamless conversions between modes for years to come. Remember that practice builds confidence—each successful transformation makes the next one smoother and more intuitive. Keep your workspace organized, move deliberately through each step, and soon transforming your Optimus Prime will feel as natural as shifting gears in the truck itself.