

Few things frustrate a child—or an adult hobbyist—more than a beloved toy car that refuses to move. When your toy car motor stops working, the problem could stem from something as simple as a dead battery or as specific as a burnt-out armature winding. This guide walks you through every major failure point, offering clear diagnostic steps and practical solutions that get toy cars rolling again.
Whether you’re dealing with a basic budget RC car, a premium radio-controlled racer, or a collectible slot car setup, the underlying principles remain consistent. Toy car motors rely on three core elements functioning in harmony: a reliable power source, intact electrical connections, and a mechanically sound motor assembly. When any one of these elements fails, the entire system grinds to a halt. Understanding how to isolate and address each potential failure point transforms what seems like a complex problem into a manageable series of checks and repairs.
The troubleshooting process follows a logical progression from the simplest possible causes to more involved diagnostics. Start with the quick checks—battery condition, basic connections—before diving into motor-specific issues. This approach saves time and prevents unnecessary disassembly or part replacements. Most toy car motor problems fall into predictable categories, and identifying which category your issue belongs to points directly toward the solution.
Check Battery and Power Supply First
The battery represents the most common culprit when a toy car motor stops working. Before touching any tools or opening any compartments, verify that the power supply delivers adequate charge and proper voltage. Dead or depleted batteries account for approximately forty percent of all toy car electrical failures, making this your highest-yield first diagnostic step.
Begin by removing the battery from its compartment and examining its condition. Look for visible signs of leakage, corrosion, or swelling—these indicate a damaged battery that needs immediate replacement. Leaking batteries can also damage electrical contacts within the toy car, creating secondary problems that persist even after you install a fresh power source. If the battery shows any physical deformation or residue, clean the compartment with a cotton swab dipped in isopropyl alcohol before inserting a new battery.
Test the battery’s charge level using a multimeter set to DC voltage. A fully charged AA battery should read approximately 1.5 to 1.6 volts, while a 9-volt battery should show readings close to 9 volts. Anything significantly lower suggests depletion or failure. For rechargeable battery packs, ensure the charger is functioning correctly and that the pack has received a full charge cycle. Some battery packs include built-in test buttons—use these to get a quick status readout.
When replacing batteries, verify that you’re using the correct type and orientation. Many toy cars use multiple batteries connected in series, and inserting one backward disrupts the entire circuit. Check the compartment diagram or user manual for proper polarity placement. After installing fresh batteries, test the car again before proceeding to more involved diagnostics—if it works, you’ve solved the problem quickly and efficiently.
Inspect Electrical Connections and Wiring

Faulty connections rank as the second most frequent cause of toy car motor failures. Even when batteries function perfectly, corroded wires, loose connectors, or damaged circuitry prevent power from reaching the motor. A systematic visual and physical inspection reveals connection problems that might otherwise seem mysterious.
Examine all visible wiring for obvious damage. Look for frayed insulation, pinched wires, or complete breaks where the copper conductor is visible. Pay particular attention to areas where wires bend or flex, such as near battery compartments, switch locations, and points where wires enter the motor housing. Repeated bending causes metal fatigue, eventually leading to internal wire breaks that interrupt power flow without any external sign of damage.
Inspect connector points where wires attach to terminals. These connections can loosen over time due to vibration during operation or simply from repeated battery changes. Gently tug on each wire connection—if it pulls free or feels loose, the connection needs re-soldering or replacement. Corroded connector tabs show green or white residue and may require cleaning with a contact cleaner or light sanding to restore proper conductivity.
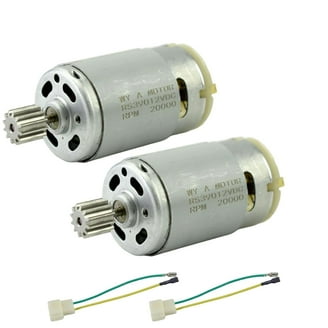
Motor brushes and commutators deserve special attention during connection inspections. These components transfer electrical current to the motor’s rotating armature and wear over time. On accessible motors, remove the brush caps and check that the brushes move freely in their housings. Brushes that have worn to less than half their original length or that show significant pitting need replacement. The commutator—the segmented copper cylinder the brushes contact—should appear clean and smooth. Dark discoloration or heavy carbon buildup interferes with electrical transfer and can cause intermittent operation or complete failure.
Test Switches and Control Mechanisms
Toy cars rely on various control mechanisms to manage power flow: simple on-off switches, forward-reverse selectors, speed controllers, and receiver units in radio-controlled models. Each of these components can fail in ways that mimic motor problems, making proper testing essential before assuming the motor itself has failed.
Locate the power switch and test its function directly. For mechanical switches, toggle the control back and forth several times while listening for an audible click. The switch should feel snappy and decisive rather than mushy or intermittent. With the switch in the “on” position, use a multimeter to verify continuity across the switch terminals—no continuity indicates an open circuit requiring switch replacement.
Electronic speed controllers (ESCs) and radio control receivers require different testing approaches. These components rarely fail outright but can malfunction due to damaged internal components or software glitches. Try resetting the ESC according to manufacturer instructions—many units include a reset procedure that clears minor errors. For radio-controlled cars, verify that the transmitter batteries are fresh and that the receiver responds to transmitter signals. Some receivers include status LEDs that indicate proper signal reception; consult your car’s documentation for interpretation.
Test the motor directly by bypassing all switches and controllers. Disconnect the motor from its usual wiring and apply battery power directly to the motor terminals using test leads. If the motor spins when connected directly, the problem lies somewhere in the control circuit rather than in the motor itself. This simple test prevents unnecessary motor replacements and directs your troubleshooting efforts toward switches, wiring, or electronic controls.
Diagnose Internal Motor Problems

When batteries, connections, and controls all check out, the motor itself requires investigation. Toy car motors fail through several distinct mechanisms, each with characteristic symptoms that guide diagnosis. Understanding these failure modes helps you determine whether repair or replacement makes the most sense.
Burnt-out motors represent the most severe failure category. Overheating from sustained high-load operation, voltage overload, or simply reaching the end of operational lifespan causes the windings to fail. A burnt motor often produces a distinctive smell—overheated insulation gives off a sharp, acrid odor. Visually, the motor may show discoloration on the housing or windings visible through the motor case. Testing continuity across the motor terminals reveals an open circuit where resistance should be present. Burnt motors cannot be repaired economically and require complete replacement.
Motors suffering from mechanical obstruction still receive power but cannot rotate freely. Debris—plastic shards, dust, carpet fibers—can become lodged between the armature and magnets, creating physical blockage. Gear teeth can strip or break, preventing the motor from turning the drive train. In these cases, the motor may hum or click when powered but fails to spin. Disassemble the motor housing and gear train to locate and remove obstructions. Inspect gears for damage and replace stripped or broken components.
Brushless motors, increasingly common in modern toy cars, operate differently than traditional brushed motors and require specialized diagnosis. These motors use electronic controllers to commutate the motor rather than physical brushes. Failure symptoms include irregular operation, unusual noises, or complete non-function. Brushless motor issues often trace back to the electronic controller rather than the motor windings themselves. Testing requires understanding the specific controller-motor pairing and often benefits from manufacturer-provided diagnostic tools or professional assessment.
Clear Debris and Perform Mechanical Cleaning
Even when no obvious blockage exists, accumulated debris can interfere with toy car motor operation. Regular cleaning extends motor lifespan and resolves performance issues that seem mysterious but stem from simple contamination. Establishing a cleaning routine prevents many common failures before they develop.
External cleaning precedes internal work. Wipe down the entire car with a soft cloth to remove accumulated dust and dirt. Pay special attention to areas near wheels and gears where debris tends to collect. For RC cars, remove the body shell and clear any debris from the chassis interior. This external cleaning prevents contaminants from entering the motor housing during subsequent disassembly.
Internal motor cleaning requires careful disassembly. Remove the motor from the car and take apart the housing according to manufacturer instructions or standard motor construction patterns. Most toy car motors feature press-fit end caps that can be pried loose with a flathead screwdriver or released by removing small retaining screws. Once opened, use compressed air to blow out loose debris and a soft brush to remove stubborn contamination.
The commutator and brush system require particular attention during cleaning. Carbon buildup on the commutator interrupts electrical contact and causes arcing that accelerates wear. Clean the commutator with a cotton swab dipped in isopropyl alcohol, working carefully around the segmented structure. For stubborn buildup, very light sanding with fine-grit sandpaper (400 grit or higher) restores smooth operation. Avoid using abrasive cleaners or metal tools that can damage the delicate commutator surfaces.
Know When to Repair Versus Replace
Economic and practical considerations guide the repair-versus-replacement decision. Some toy car motor problems justify the time and expense of repair, while others make replacement the smarter choice. Evaluating factors including motor cost, repair complexity, and overall car value helps you make informed decisions.
Minor issues like dirty commutators, worn brushes, or obstructed bearings typically justify repair. These problems are inexpensive to address and respond well to component-level service. The parts cost remains low, and the required tools are minimal. Repair makes particular sense for higher-quality motors where replacement costs would be significant.
Extensive motor damage, repeated failures, or obsolete motor designs often point toward replacement rather than continued repair. When the cost of replacement parts and labor approaches or exceeds the cost of a new motor, replacement offers better value. Similarly, if a motor has failed multiple times despite proper maintenance, underlying issues may make continued repair futile. In these cases, replacement provides reliable operation without ongoing investment.
The overall value of the toy car influences the repair equation. Inexpensive basic toys rarely justify significant repair investment—replacement often costs less than diagnostic time and parts. Collectible or high-value toy cars, conversely, merit careful repair to preserve original components and maintain value. RC cars with expensive electronics paired with failed motors may justify motor replacement to preserve the electronic investment. Match your repair investment to the value of the item being restored.
Get Your Toy Car Moving Again
Troubleshooting a non-working toy car motor follows a logical progression from simple to complex, beginning with power supply verification and advancing through connection inspection, control testing, and motor-specific diagnosis. Most failures stem from accessible, serviceable causes that patient troubleshooting can identify and resolve. The key is working systematically through potential causes rather than assuming the worst.
Armed with the diagnostic steps and repair techniques in this guide, you can confidently approach toy car motor problems regardless of your prior experience. Start with the quick checks—batteries and connections—before investing time in more involved diagnostics. When motor repair is necessary, component-level service often suffices where complete replacement would otherwise seem required. Regular maintenance prevents most failures and extends the operational life of toy car motors significantly.
The satisfaction of restoring a beloved toy car to working condition rewards the effort invested in troubleshooting and repair. Whether you’re rescuing a child’s forgotten favorite or bringing a collectible back to pristine condition, the skills developed through this process serve you well across all future maintenance challenges. Your toy car motor problems have solutions—now you know exactly how to find them.